
In my previous article Resizing a VMware Fusion Ubuntu Server Virtual Drive (via Easy Mode), I described what was needed to enlarge your Virtual Drive (VHD) on a VMware Fusion VM that was setup by the “Easy Install” method. If you are confused by what the “Easy Install” method is, there is a prompt when creating a new VM that asks you to provide information for a new account:
- Full Name
- Username
- Password
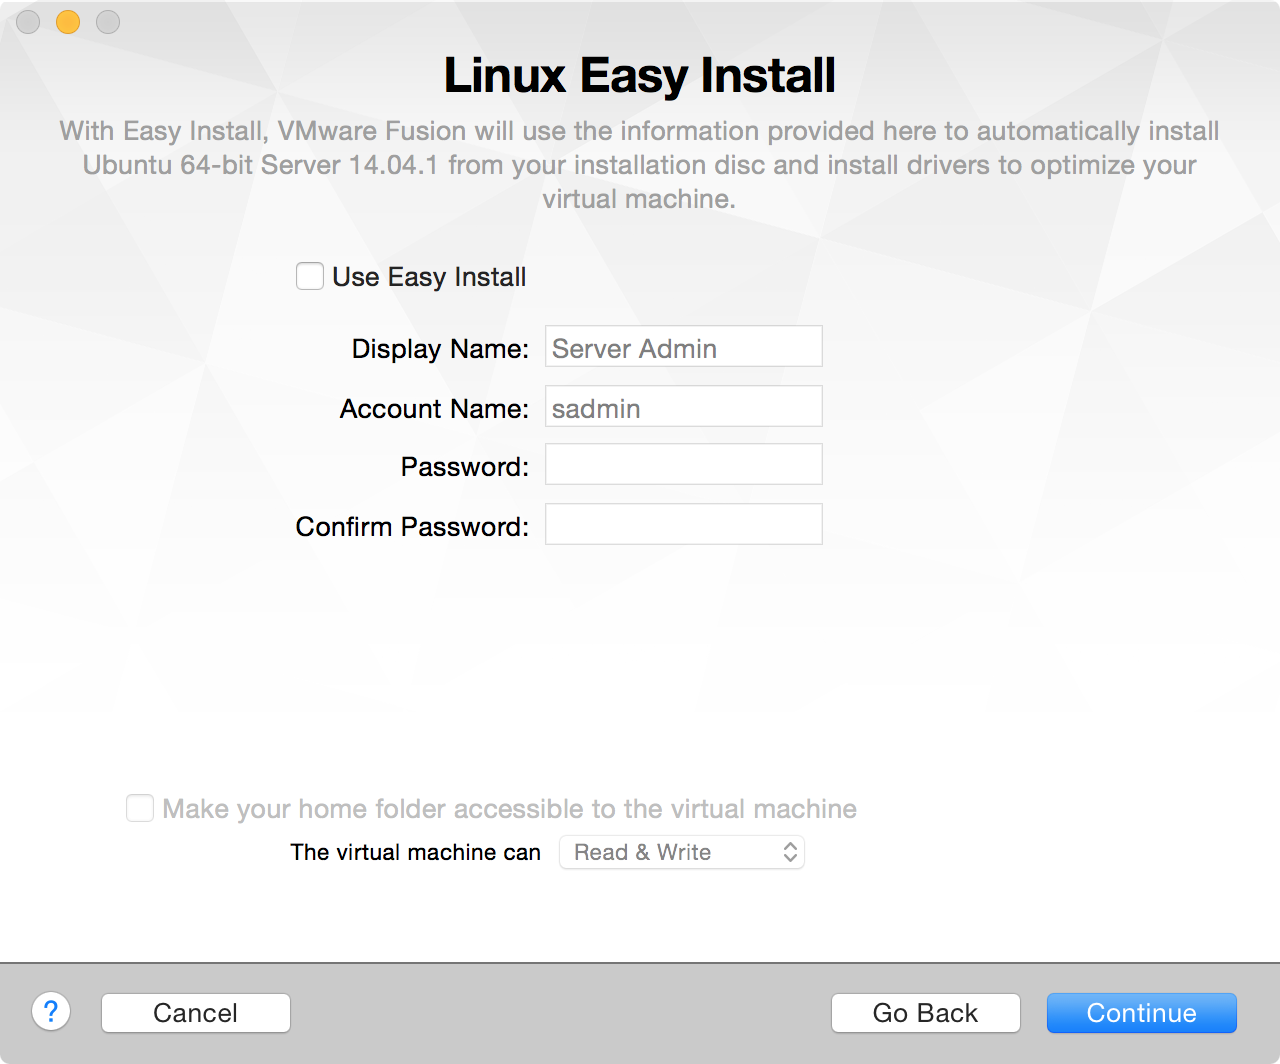
By deselecting the “Use Easy Install” checkbox, you will be required to walk through the OS install setup just like if you were loading a physical CD into a physical machine. One of the steps during the setup assistant for Ubuntu Server is partitioning your Drive which has a default value of “Guided - use entire disk and set up LVM”.
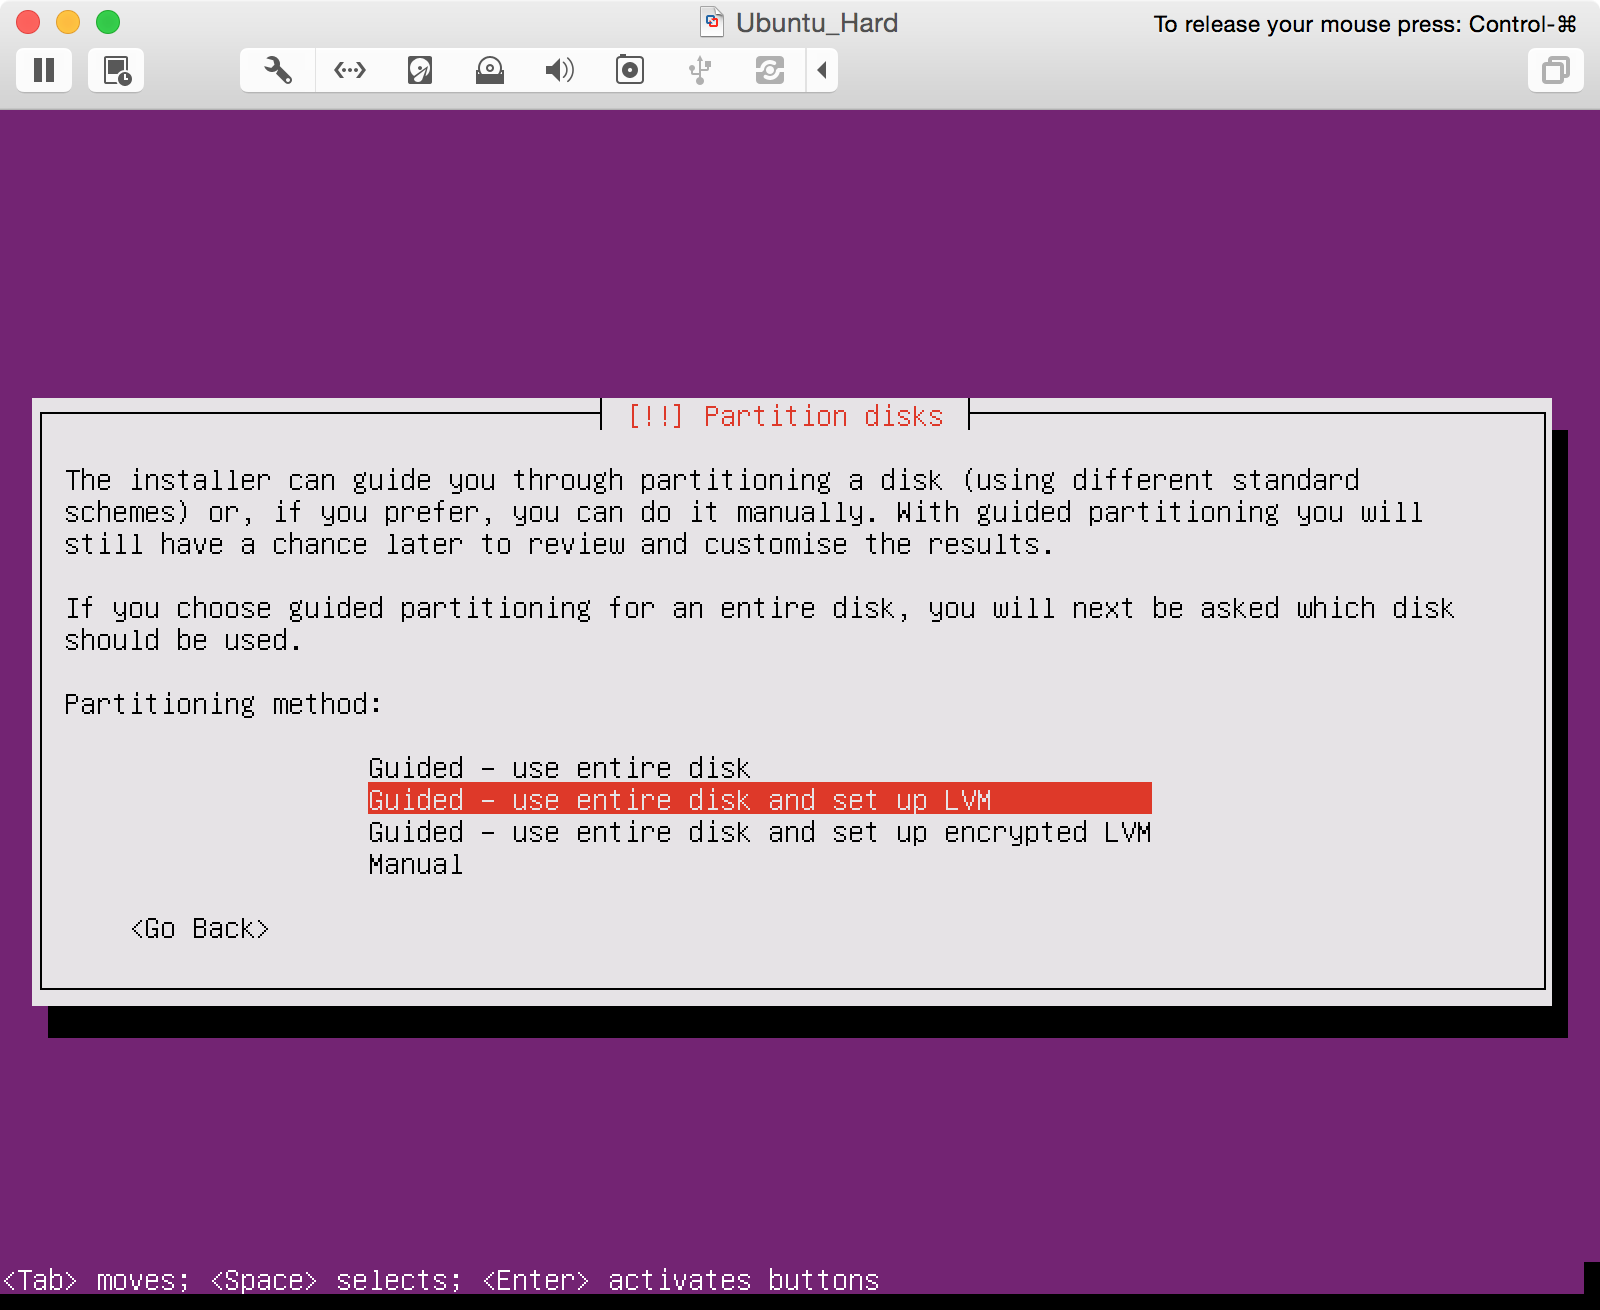
LVM stands for Logicial Volume Management. I found the best quickest explanation for why you would want an LVM environment in the Ask Ubuntu forums:
You can think of LVM as “dynamic partitions”, meaning that you can create/resize/delete LVM “partitions” (they’re called “Logical Volumes” in LVM-speak) from the command line while your Linux system is running: no need to reboot the system to make the kernel aware of the newly-created or resized partitions. The Benefits of LVM
So let’s see what we are working with and how it differs from the “Easy Install”. We’ll launch our new Ubuntu Server VM and perform the same tasks as last time to get a sense of how much space is available.
sadmin@ubuntu:~$ sudo fdisk -l

Disk /dev/sda: 21.5 GB, 21474836480 bytes
255 heads, 63 sectors/track, 2610 cylinders, total 41943040 sectors
Units = sectors of 1 * 512 = 512 bytes
Sector size (logical/physical): 512 bytes / 512 bytes
I/O size (minimum/optimal): 512 bytes / 512 bytes
Disk identifier: 0x00057b2d

   Device Boot      Start         End      Blocks   Id  System
/dev/sda1   *        2048      499711      248832   83  Linux
/dev/sda2          501758    41940991    20719617    5  Extended
/dev/sda5          501760    41940991    20719616   8e  Linux LVM

Disk /dev/mapper/ubuntu--vg-root: 19.1 GB, 19050528768 bytes
255 heads, 63 sectors/track, 2316 cylinders, total 37208064 sectors
Units = sectors of 1 * 512 = 512 bytes
Sector size (logical/physical): 512 bytes / 512 bytes
I/O size (minimum/optimal): 512 bytes / 512 bytes
Disk identifier: 0x00000000

Disk /dev/mapper/ubuntu--vg-root doesn't contain a valid partition table

Disk /dev/mapper/ubuntu--vg-swap_1: 2143 MB, 2143289344 bytes
255 heads, 63 sectors/track, 260 cylinders, total 4186112 sectors
Units = sectors of 1 * 512 = 512 bytes
Sector size (logical/physical): 512 bytes / 512 bytes
I/O size (minimum/optimal): 512 bytes / 512 bytes
Disk identifier: 0x00000000

Disk /dev/mapper/ubuntu--vg-swap_1 doesn't contain a valid partition table
HELLO! That was a lot more information than last time! The biggest clue as that we are dealing with a LVM system (outside the amount of text that is returned from one command) is the “Linux LVM” description for /dev/sda5.
Let’s see what are the results from our command after we increase our VM size from 20GB to 30 GB (like we did last time).
sadmin@ubuntu:~$ sudo fdisk -l

Disk /dev/sda: 32.2 GB, 32212254720 bytes
255 heads, 63 sectors/track, 3916 cylinders, total 62914560 sectors
Units = sectors of 1 * 512 = 512 bytes
Sector size (logical/physical): 512 bytes / 512 bytes
I/O size (minimum/optimal): 512 bytes / 512 bytes
Disk identifier: 0x00057b2d

   Device Boot      Start         End      Blocks   Id  System
/dev/sda1   *        2048      499711      248832   83  Linux
/dev/sda2          501758    41940991    20719617    5  Extended
/dev/sda5          501760    41940991    20719616   8e  Linux LVM

Disk /dev/mapper/ubuntu--vg-root: 19.1 GB, 19050528768 bytes
255 heads, 63 sectors/track, 2316 cylinders, total 37208064 sectors
Units = sectors of 1 * 512 = 512 bytes
Sector size (logical/physical): 512 bytes / 512 bytes
I/O size (minimum/optimal): 512 bytes / 512 bytes
Disk identifier: 0x00000000

Disk /dev/mapper/ubuntu--vg-root doesn't contain a valid partition table

Disk /dev/mapper/ubuntu--vg-swap_1: 2143 MB, 2143289344 bytes
255 heads, 63 sectors/track, 260 cylinders, total 4186112 sectors
Units = sectors of 1 * 512 = 512 bytes
Sector size (logical/physical): 512 bytes / 512 bytes
I/O size (minimum/optimal): 512 bytes / 512 bytes
Disk identifier: 0x00000000

Disk /dev/mapper/ubuntu--vg-swap_1 doesn't contain a valid partition table
DRAT! We’re still in the same situation as last time that our environment knows we should have 30GB of space (e.g. “Disk /dev/sda: 32.2 GB”), but the number of blocks for /dev/sda5 is not showing any change nor did “Disk /dev/mapper/ubuntu–vg-root” increase in size (e.g. “19.1 GB, 19050528768 bytes”).
To see additional information about our LVM environment we can use the lvscan and lvs commands to find the size of our LVMs, the name of the Logical Volume, and Volume Group (in this case, “ubuntu-vg”). Full LVM details are available via lvdisplay command (think of this as diskutil cs list for OSX admins).
sadmin@ubuntu:~$ sudo lvscan
  ACTIVE            '/dev/ubuntu-vg/root' [17.74 GiB] inherit
  ACTIVE            '/dev/ubuntu-vg/swap_1' [2.00 GiB] inherit

sadmin@ubuntu:~$ sudo lvs
  LV     VG        Attr      LSize  Pool Origin Data%  Move Log Copy%  Convert
  root   ubuntu-vg -wi-ao--- 17.74g
  swap_1 ubuntu-vg -wi-ao---  2.00g

sadmin@ubuntu:~$ sudo lvdisplay
  --- Logical volume ---
  LV Path                /dev/ubuntu-vg/root
  LV Name                root
  VG Name                ubuntu-vg
  LV UUID                X3avCO-5H0o-PO6l-K6eg-IpQC-rXxw-7dfe0t
  LV Write Access        read/write
  LV Creation host, time ubuntu, 2015-02-03 20:59:13 -0500
  LV Status              available
  # open                 1
  LV Size                17.74 GiB
  Current LE             4542
  Segments               1
  Allocation             inherit
  Read ahead sectors     auto
    - currently set to     256
  Block device           252:0

  --- Logical volume ---
  LV Path                /dev/ubuntu-vg/swap_1
  LV Name                swap_1
  VG Name                ubuntu-vg
  LV UUID                sZ2BFu-TtbB-xxr0-w7jB-ZgOT-b0rK-e73G8B
  LV Write Access        read/write
  LV Creation host, time ubuntu, 2015-02-03 20:59:13 -0500
  LV Status              available
  # open                 2
  LV Size                2.00 GiB
  Current LE             511
  Segments               1
  Allocation             inherit
  Read ahead sectors     auto
    - currently set to     256
  Block device           252:1
Steps to Increase your VMware Fusion LVM
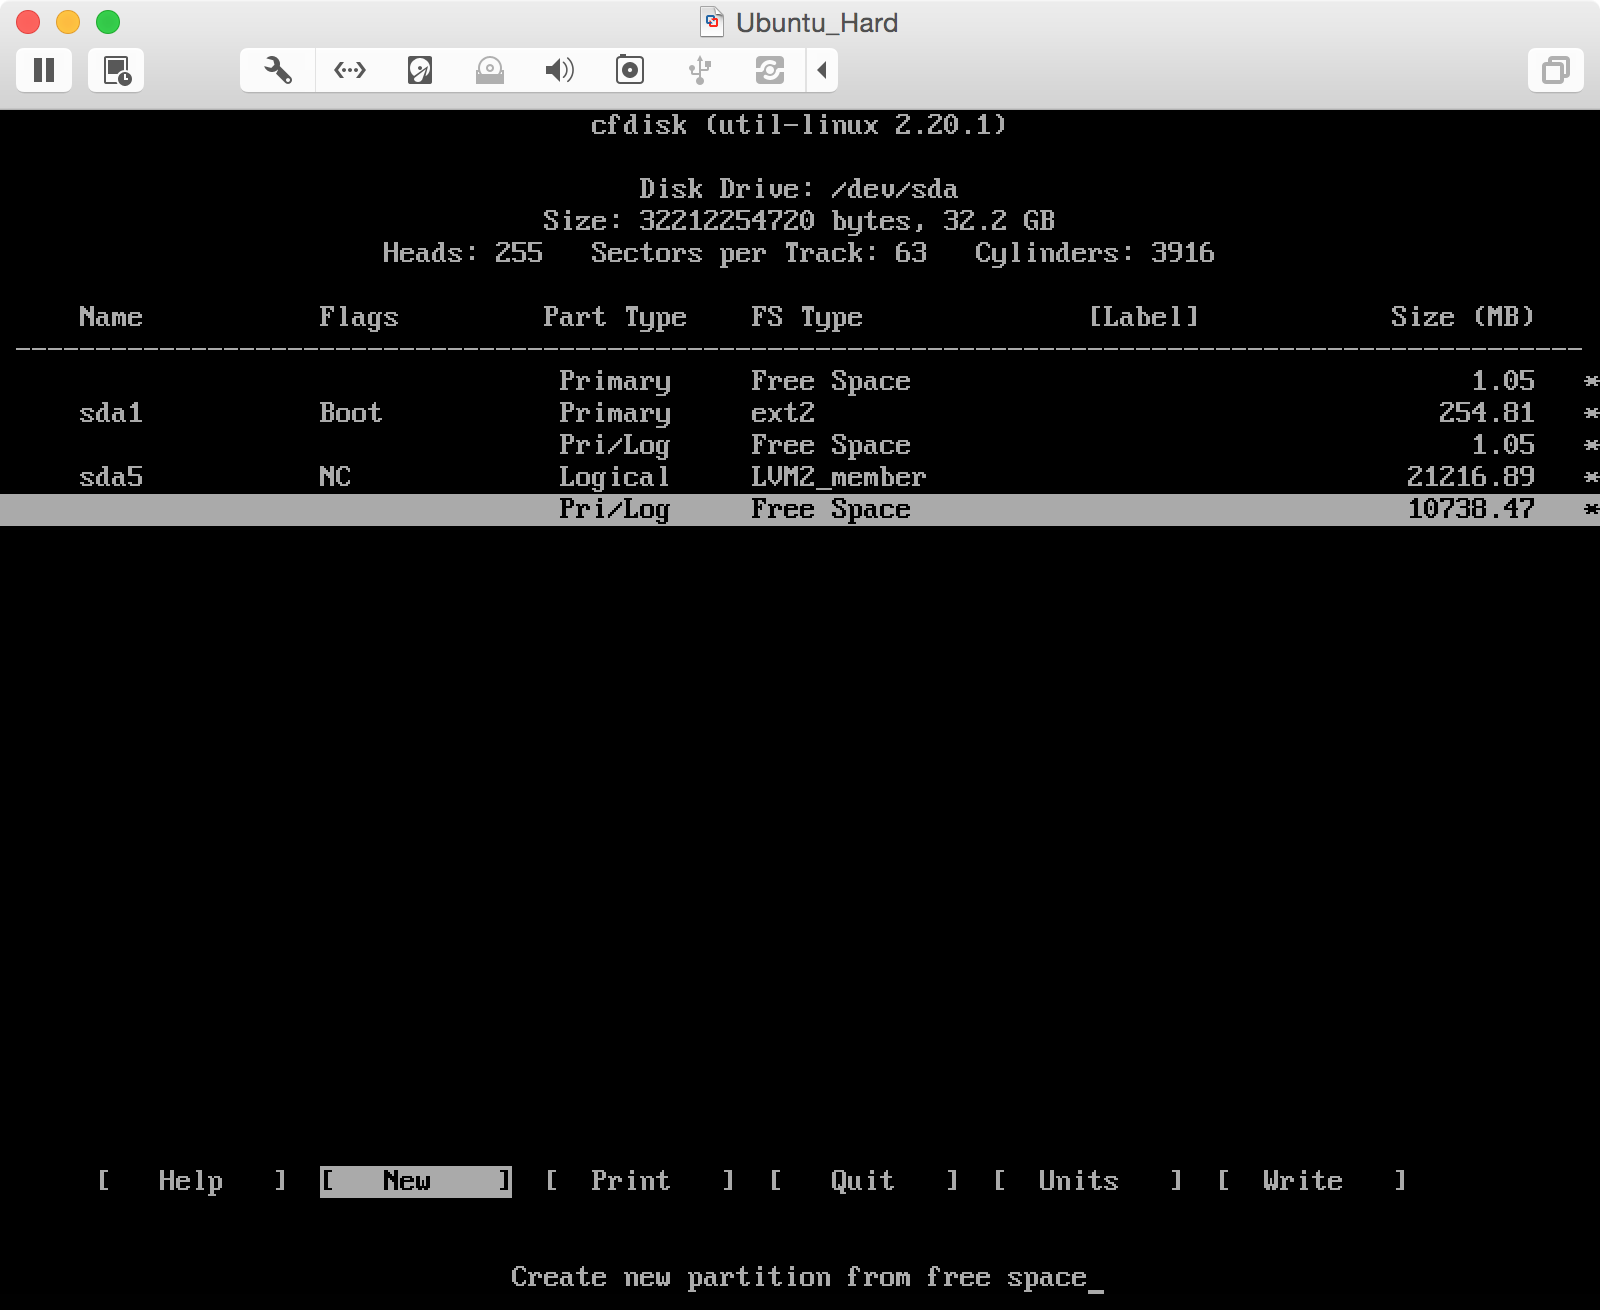
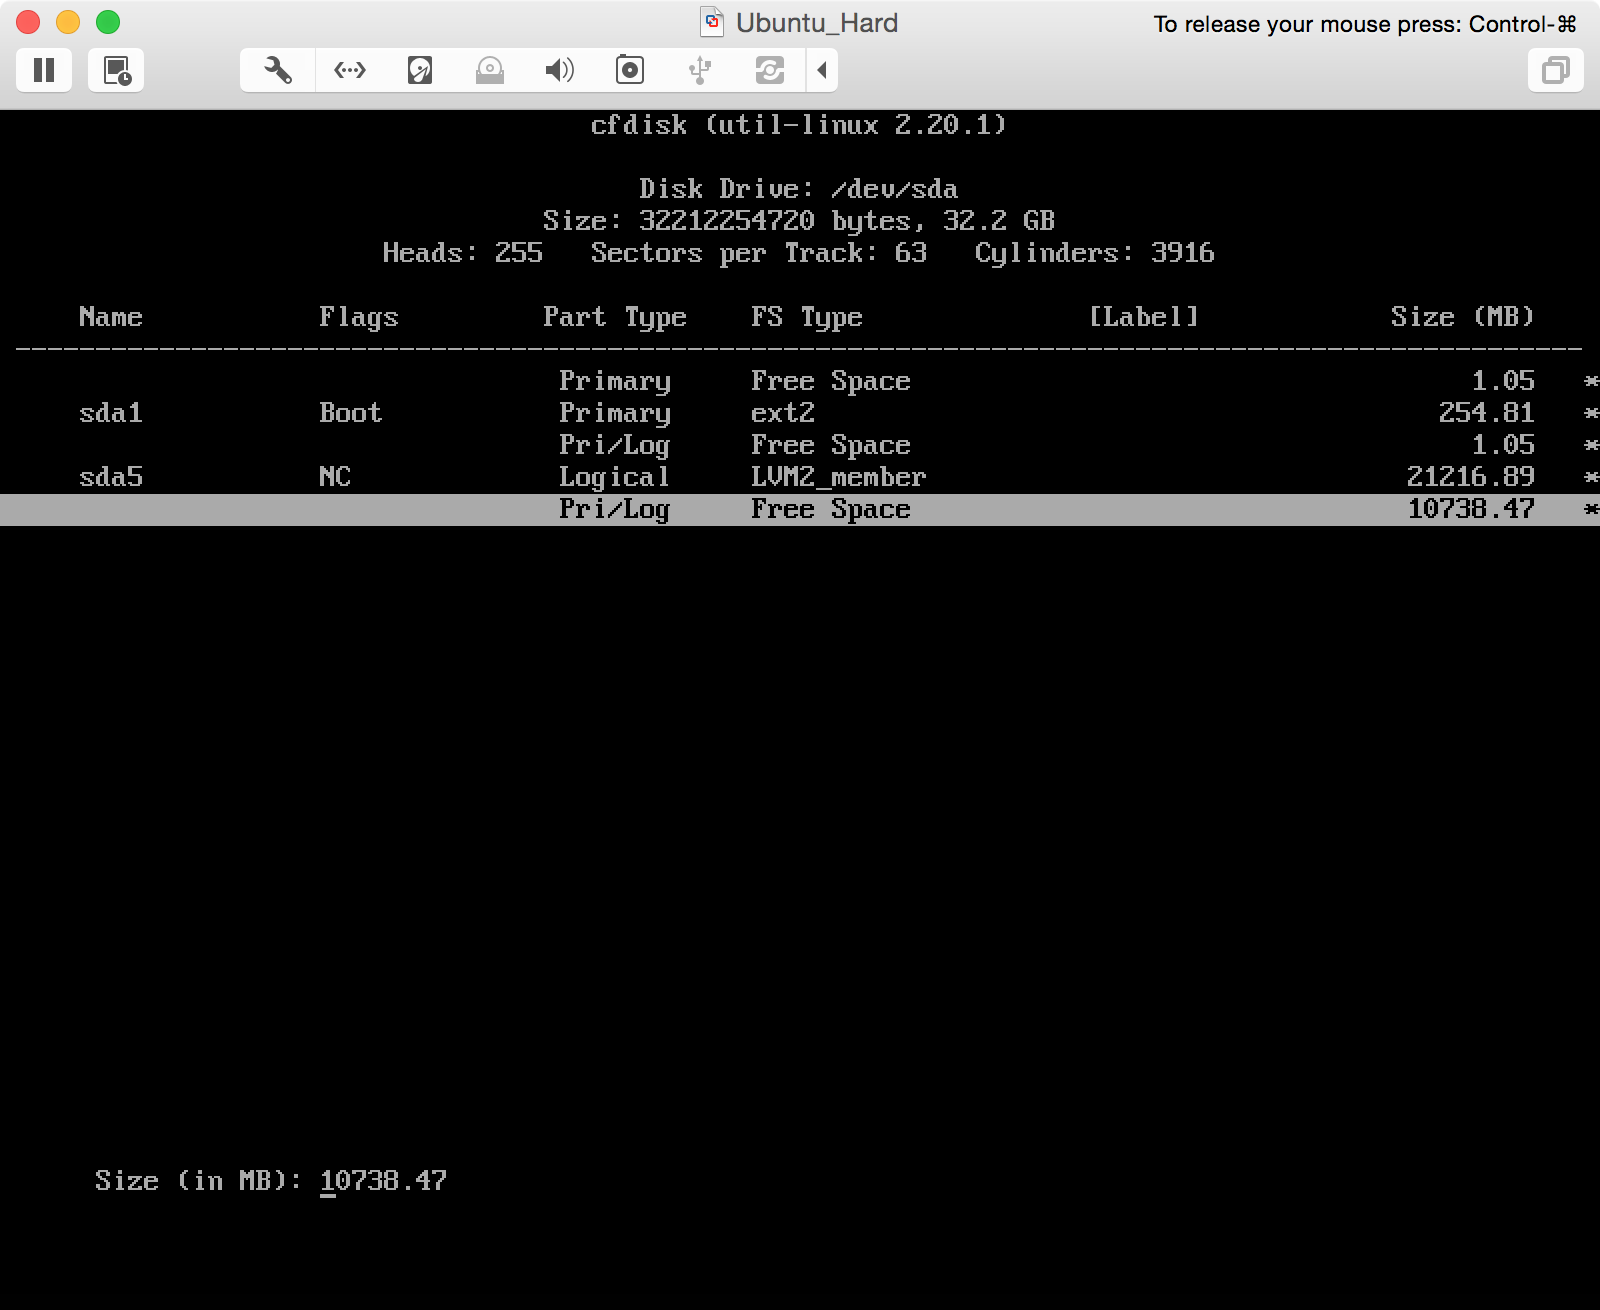
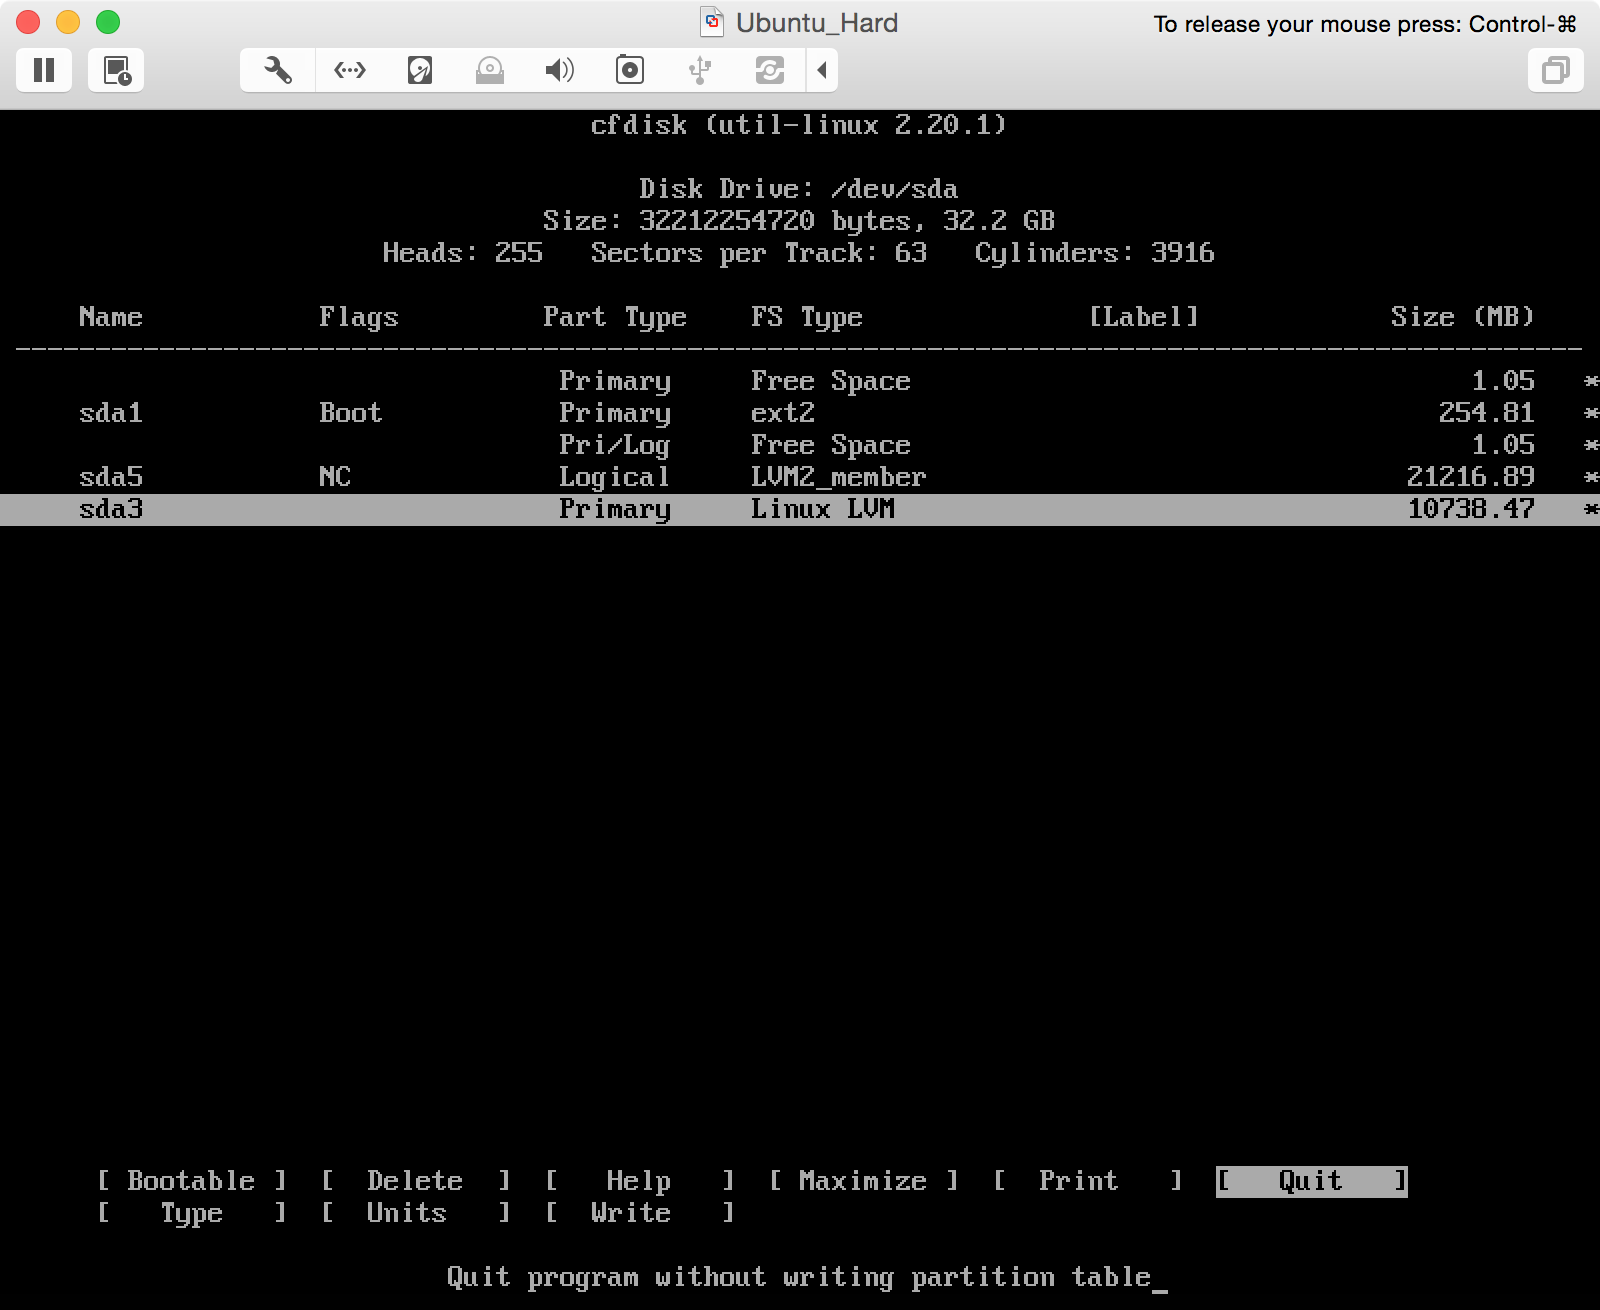
First thing we need configure to increase the disk space of our VM is by using the sudo cfdisk command to create a new Primary partition using the 8e/lvm format from our “Free Space”. The steps (with screen shots below) are:
- Find your “Free Space” and create a new partition
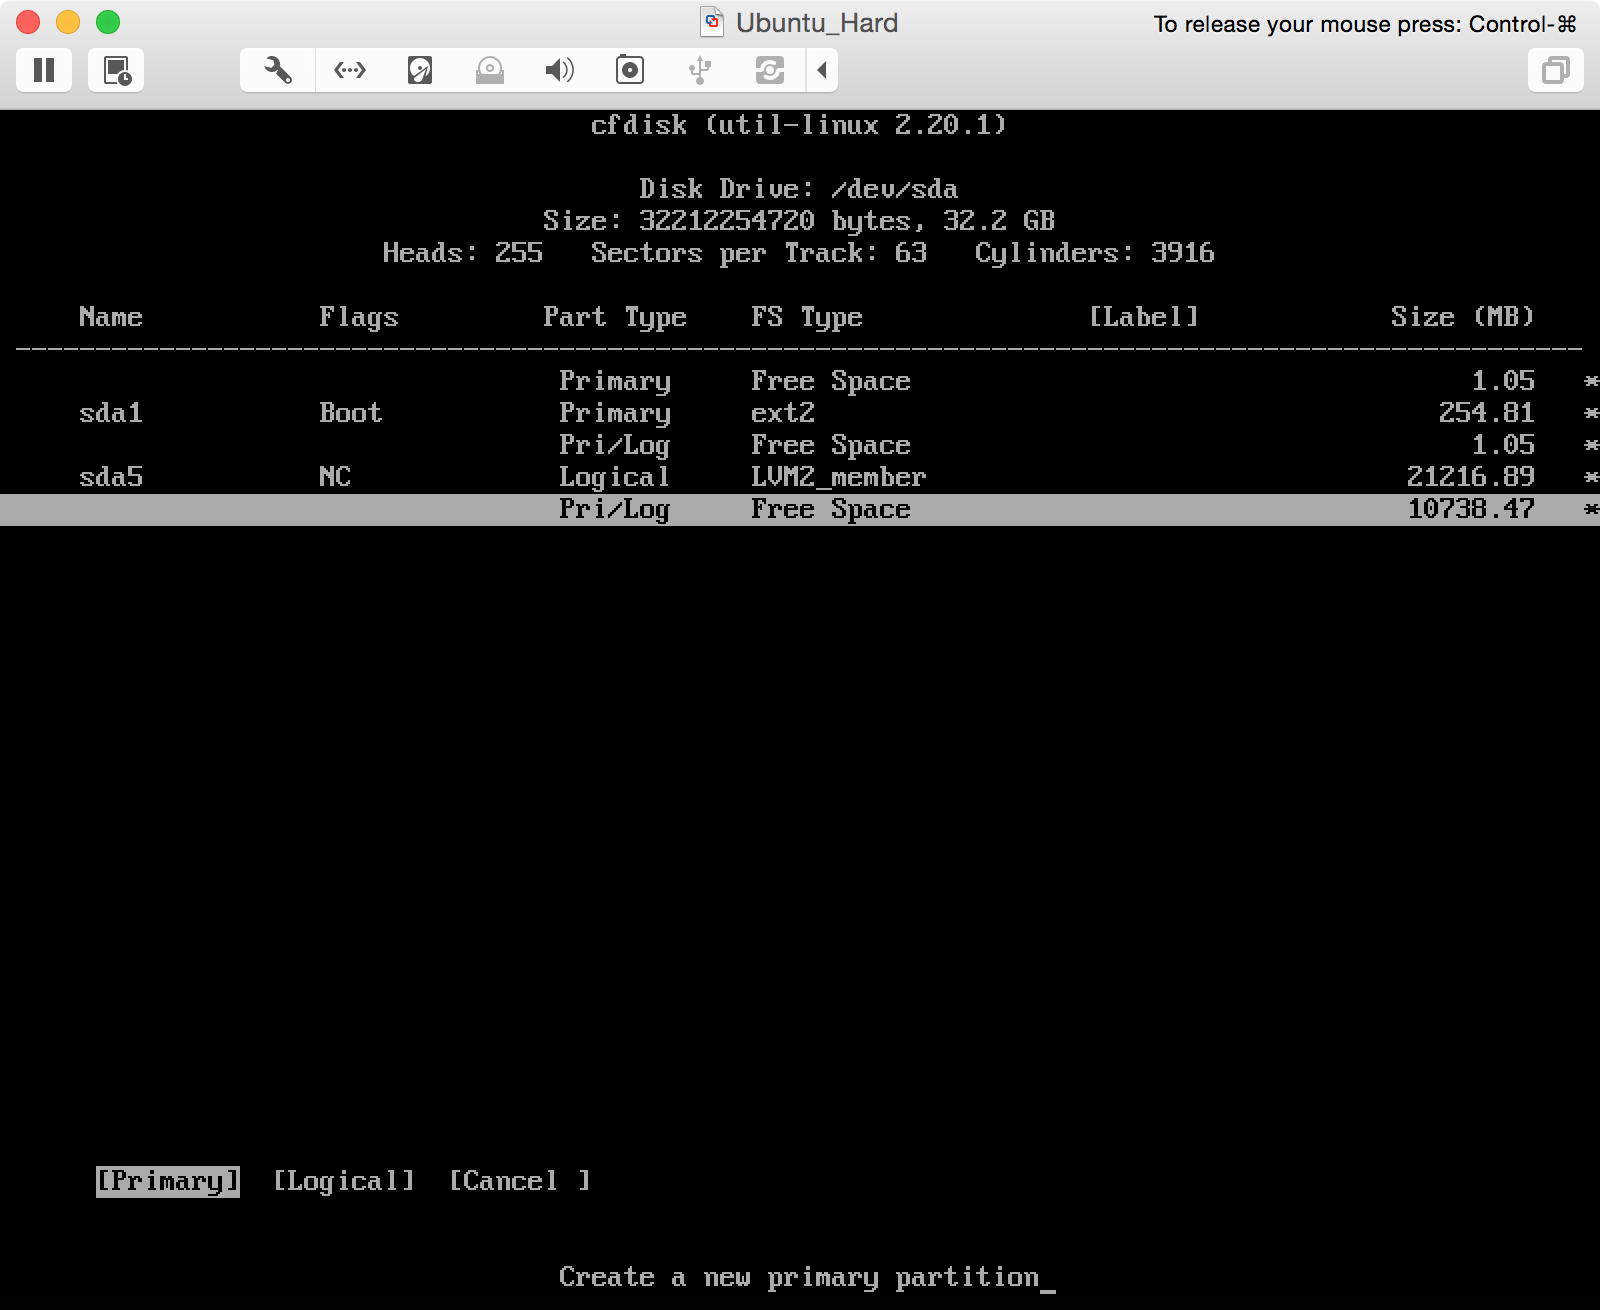
- Select to create a Primary partition
- Use the entire partition by using the Enter key
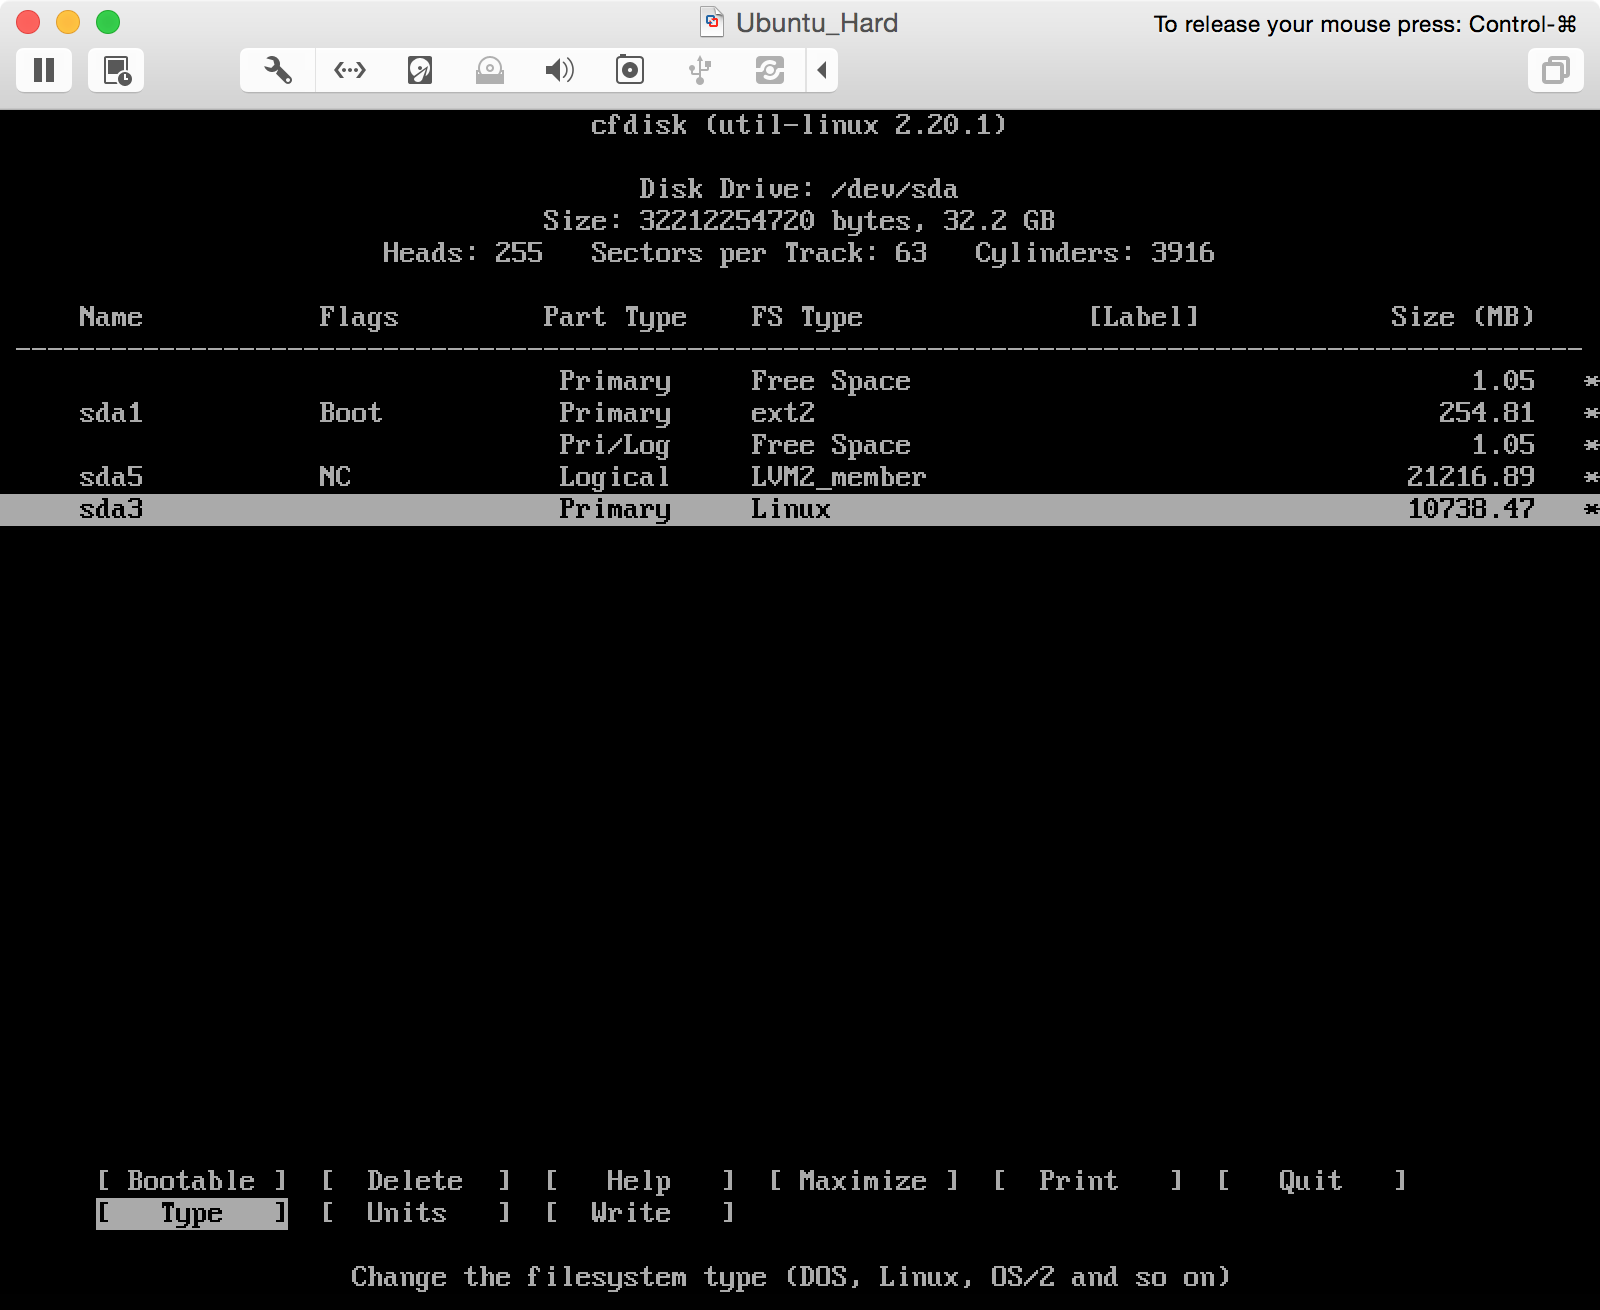
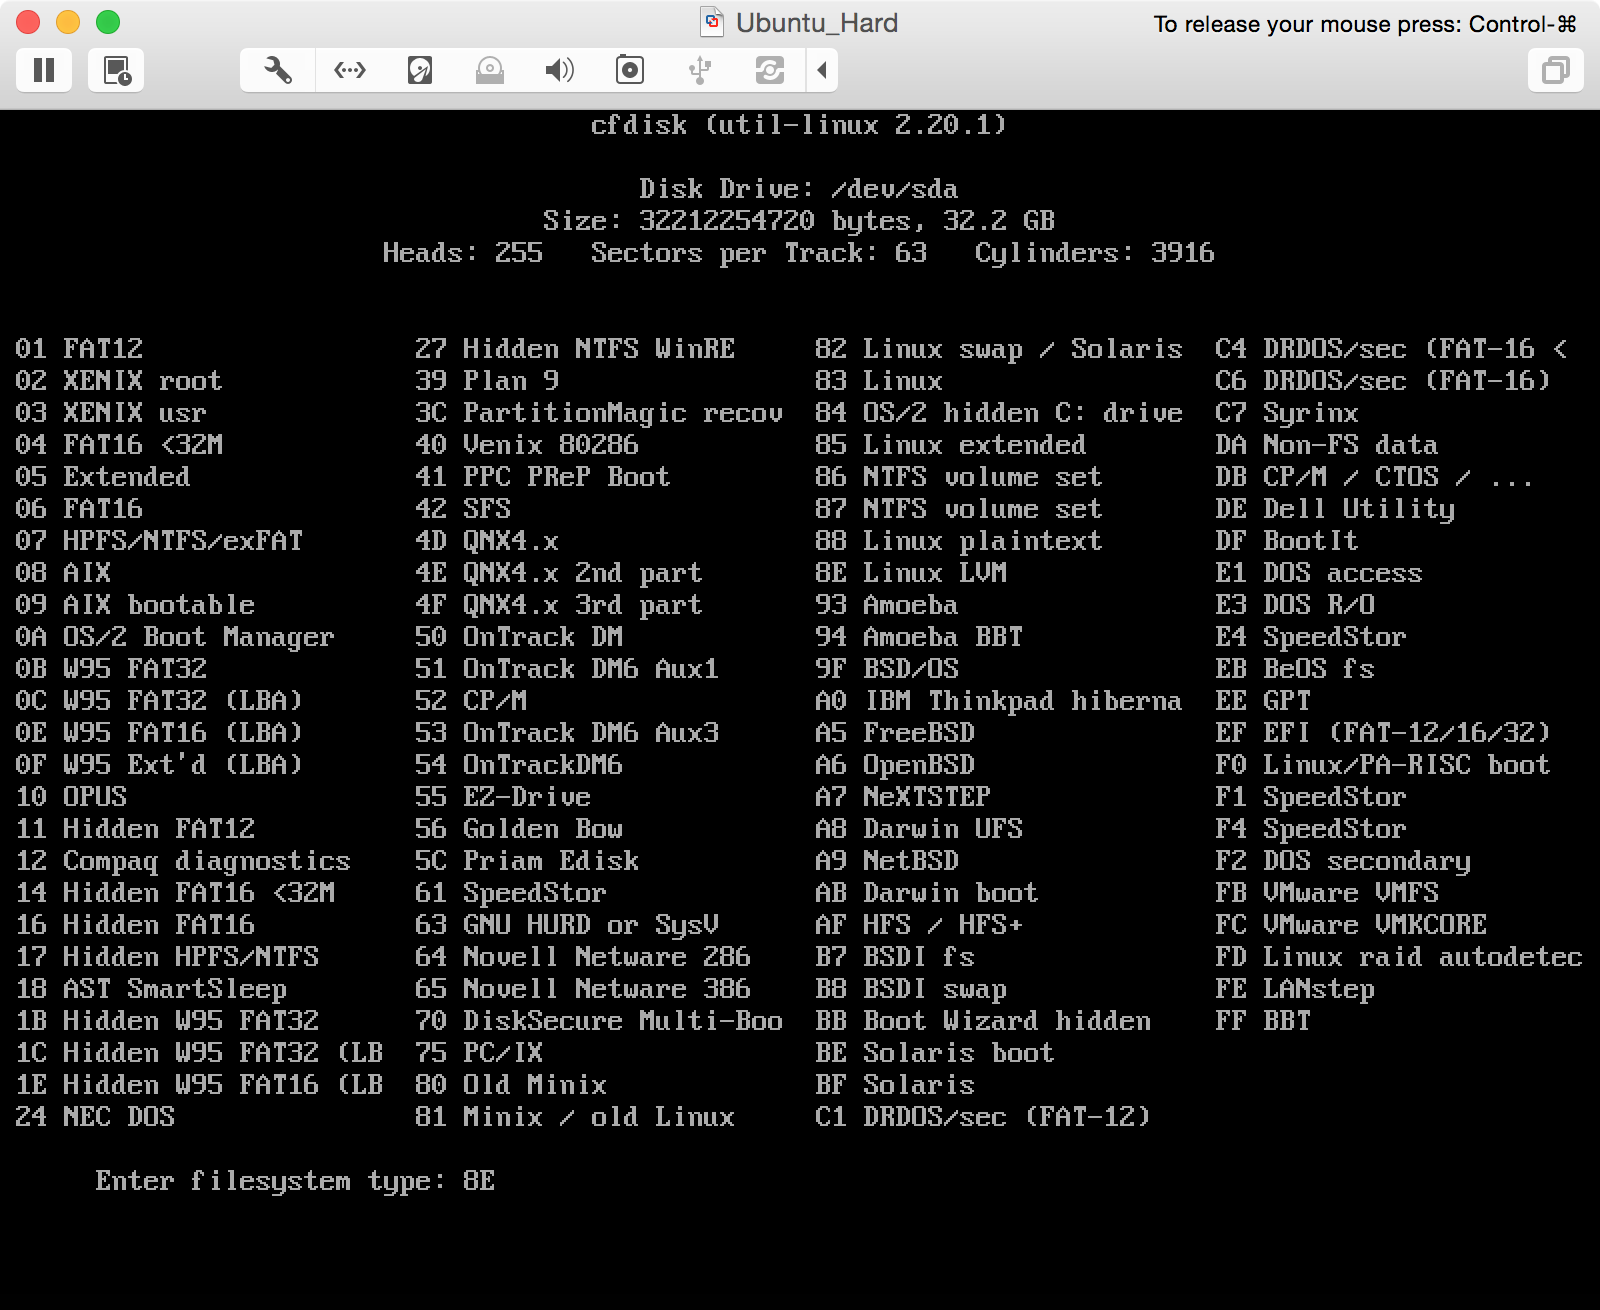
- Change the partition Type
- Use “8E” (case sensitive) for “Linux LVM”
- Write the new partition map
- Type “yes” to verify partition map
- Quit

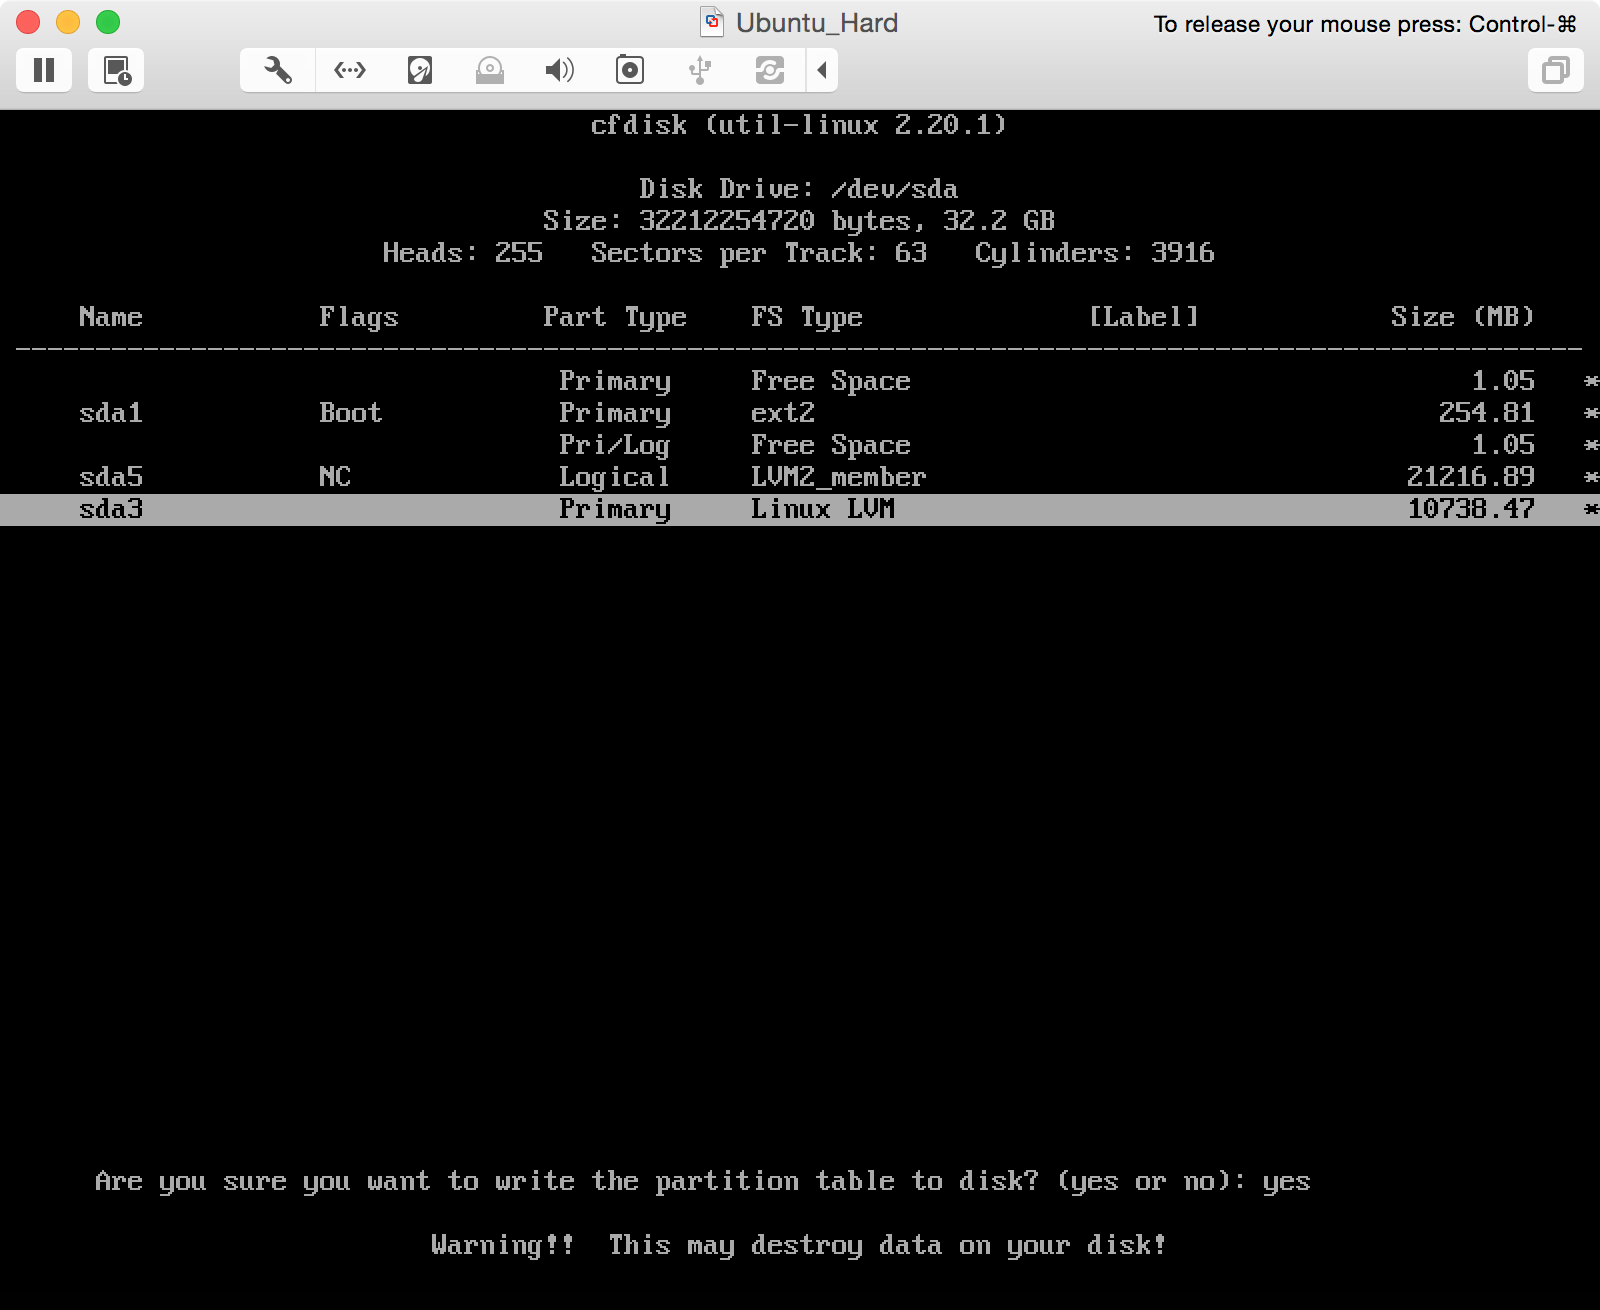
You may noticed immediately after we write the partition map there was a error message at the bottom of the screen that states “Wrote partition table, but re-read table failed. Run partprobe(8), kpartx(8) or reboot to update table”… please reboot. Once restarted, we’ll run sudo fdisk -l again to grab the location of our new partition (truncated for brevity).
   Device Boot      Start         End      Blocks   Id  System
/dev/sda1   *        2048      499711      248832   83  Linux
/dev/sda2          501758    41940991    20719617    5  Extended
/dev/sda3        41940992    62914559    10486784   8e  Linux LVM
/dev/sda5          501760    41940991    20719616   8e  Linux LVM
Next we need to do the following steps all via command line
# Make the new partition an lvm physical volume
sadmin@ubuntu:~$ sudo pvcreate /dev/sda3
  Physical volume "/dev/sda3" successfully created

# Add the new physical volume to the volume group found in the output of "sudo lvs"
sadmin@ubuntu:~$ sudo vgextend ubuntu-vg /dev/sda3
  Volume group "ubuntu-vg" successfully extended

# Increase the logical volume size
sadmin@ubuntu:~$ sudo lvextend -L+10G /dev/ubuntu-vg/root
  Extending logical volume root to 27.74 GiB
  Logical volume root successfully resized

# Increase the file system size
sadmin@ubuntu:~$ sudo resize2fs /dev/ubuntu-vg/root
resize2fs 1.42.9 (4-Feb-2014)
Filesystem at /dev/ubuntu-vg/root is mounted on /; on-line resizing required
old_desc_blocks = 2, new_desc_blocks = 2
The filesystem on /dev/ubuntu-vg/root is now 7272448 blocks long.
We’re done! Let’s verify by quickly rerunning our LVM commands [ lvscan | lvs ] and/or doing a df -H | grep mappter
sadmin@ubuntu:~$ sudo lvscan
  ACTIVE            '/dev/ubuntu-vg/root' [27.74 GiB] inherit
  ACTIVE            '/dev/ubuntu-vg/swap_1' [2.00 GiB] inherit

sadmin@ubuntu:~$ sudo lvs
  LV     VG        Attr      LSize  Pool Origin Data%  Move Log Copy%  Convert
  root   ubuntu-vg -wi-ao--- 27.74g
  swap_1 ubuntu-vg -wi-ao---  2.00g

sadmin@ubuntu:~$ df -H | grep mapper
/dev/mapper/ubuntu--vg-root   30G  1.2G   27G   5% /
Source
Comments are closed. If you have a question concerning the content of this page, please feel free to contact me.


Comments
Andy
This was spot on and worked perfectly on my VMware ESXi setup – thanks!